Operate priming lever of fuel lift pump (see Fig. N.4). (Note. If the cam on engine camshaft driving fuel lift pump is on maximum lift, it will not be possible to operate hand primer, and the engine should be turned one complete revolution). When fuel, free from air bubbles, issues from each vent point, tighten the connections in the following order: -
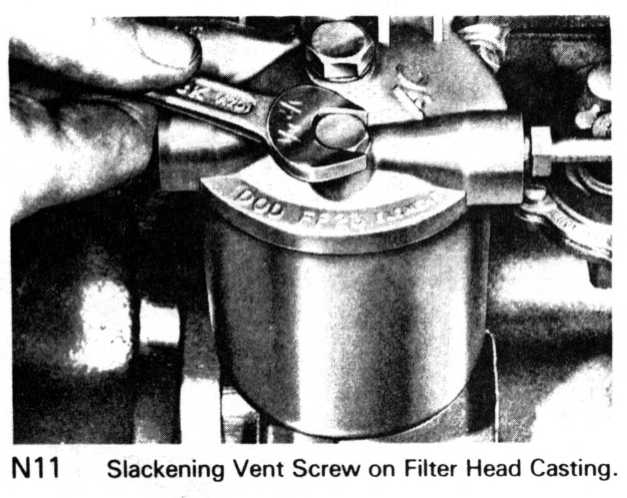
Filter head venting screw (if fitted).
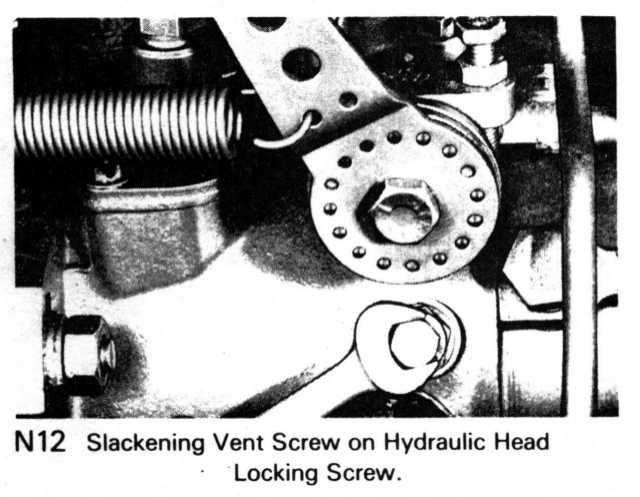
Head locking screw on fuel injection pump.
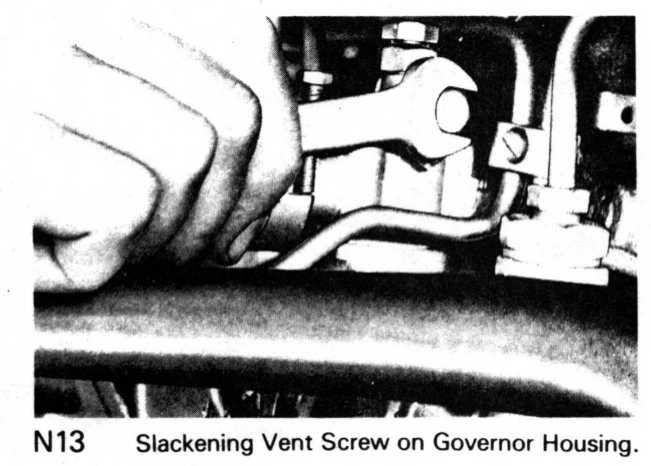
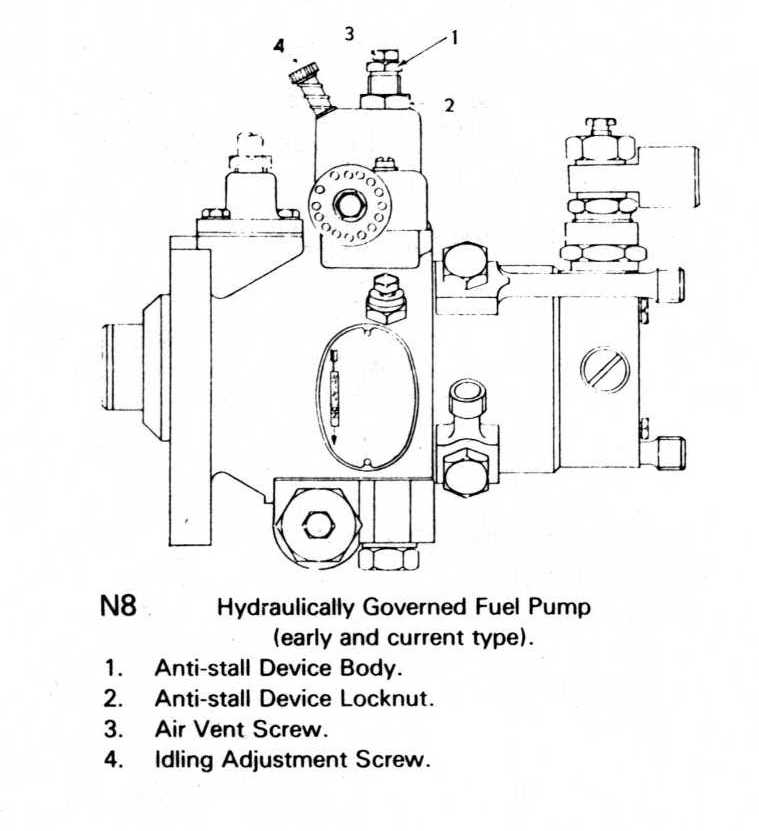
Governor vent screw on fuel injection pump.
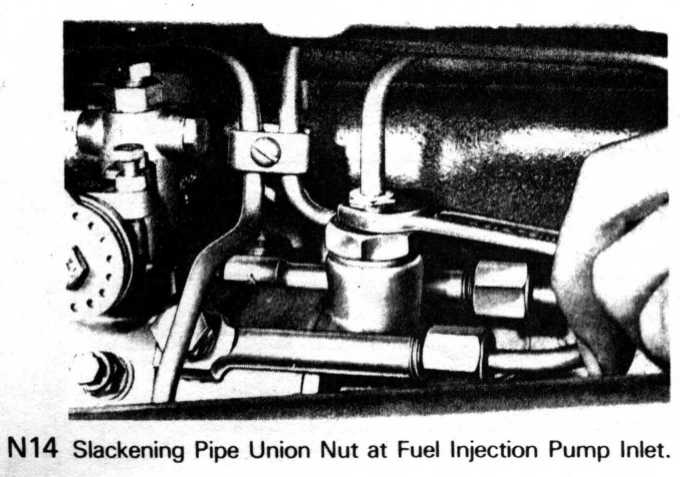
- Slacken pipe union nut at fuel injection pump inlet (see Fig. N.14), operate priming lever on lift pump and re-tighten when fuel, free from air bubbles, issues from around threads.
- Slacken the unions at the atomiser ends of the high-pressure fuel pipes.
- Set the accelerator in the fully open position and ensure that the stop control is in the "run" position.
- Turn engine with starter motor until fuel oil, free from air bubbles, issues from all fuel pipes. Some 30 to 60 seconds of rotation may be necessary before this condition is reached, and the time will be dependent upon speed of rotation and effectiveness of bleeding operation described previously. A fully charged battery in a temperate or warm climate will rotate engine at upwards of 280 rev/mm, and under these conditions, the remaining air should be expelled in under 30 seconds. Cold conditions or partially discharged batteries may take longer.
- Tighten unions on fuel pipes and engine is ready for starting.
- If after bleeding fuel system the engine starts arid runs satisfactorily, but after a few minutes it stops, then it can be assumed that air is trapped in the fuel injection pump and the bleeding procedure, should be repeated, at the same time checking for air leaks on the suction side, such as loose connections or faulty joints.
Priming Procedure after Changing a Filter Element
Note: Where the fuel filter cover does not incorporate a vent screw, the priming of the fuel filter is automatic.
- With vent screw (if fitted) on filter cover removed, and the union at the filter end of the return pipe (filter to tank) slackened, operate feed pump priming lever until fuel, free from air bubbles, issues from filter cover vent.
- Replace vent plug, and continue to operate priming lever until fuel, free from air bubbles, issues from around threads of return pipe union.
- Tighten return pipe union.
- Slacken union at filter end of filter to injection pump feed pipe, and operate priming lever until fuel, free from air bubbles, issues from around the union threads.
- Tighten feed pipe union. Pump and filter are now filled and primed.
Fuel Oil
The fuel used in the engine must be clean and should conform to the specification given in 'Data and Dimensions for Fuel System'.
The importance of clean fuel passing through your fuel injection pump and atomizers cannot be too strongly emphasized.
Some applications have a gauze trap in the filler of the fuel tank. This must not be removed when fuel is being poured into the tank.
If there is no filter in the filler and any doubt exists as to the cleanliness of the fuel, the fuel should be poured through a fine gauze strainer.
Do not store fuel oil in a galvanized container.